Friday, 11 August 2017

Multi VF Page Redirects Using Single Controller

Hi Awesome Developers,

Have you ever thought of redirecting to multiple pages using a single controller, here is what I have come up with the scenarios of redirecting to different pages using same controller.

Scenario 1:
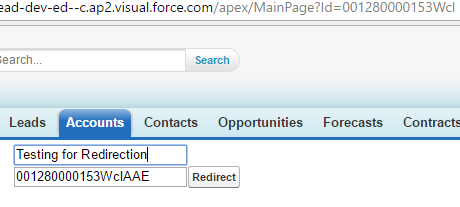
Main Page
<apex:page standardController="Account" extensions="PageRedirectDemo">
    <apex:form>
         <apex:inputtext value="{!strReceivedText}" /> <br/>
         <apex:inputtext value="{!objAccount.Id}" />
         <apex:commandbutton action="{!redirect}" value="Redirect"/>
   </apex:form>
</apex:page>

Controller :
public with sharing class PageRedirectDemo
{
   public string strReceivedText{get;set;}
   public Account objAccount{get;set;}

   public PageRedirectDemo(ApexPages.StandardController stdController){
         objAccount = (Account)stdController.getRecord();
   }

   public pagereference redirect(){
      PageReference ref = new PageReference('/apex/RedirectedPage'+'?id='+objAccount.Id);
      ref.setRedirect(false);
      return ref;
   }

}

Redirected Page
<apex:page standardController="Account" extensions="PageRedirectDemo">
 <apex:outputLabel>Value received from Page 1</apex:outputLabel> <br/>
 <apex:outputText> {!strReceivedText } </apex:outputText>
</apex:page>

Output :


The above will work well if I keep the signature of second page same as first. Now I have changed the signature of the second page as below and added empty constructor in the controller.

<apex:page controller="PageRedirectDemo">
 <apex:outputLabel>Value received from Page 1</apex:outputLabel><br/>
 <apex:outputText> {!strReceivedText } </apex:outputText> <br/>
  <apex:outputtext value="{!objAccount.Id}" />
</apex:page>

public with sharing class PageRedirectDemo
{
   public string strReceivedText{get;set;}
   public Account objAccount{get;set;}

   public PageRedirectDemo(){
   }
   public PageRedirectDemo(ApexPages.StandardController stdController){
         objAccount = (Account)stdController.getRecord();
   }

   public pagereference redirect(){
      PageReference ref = new PageReference('/apex/RedirectedPage'+'?id='+objAccount.Id);
      ref.setRedirect(false);
      return ref;
   }

}

You can see the values are not set due to change in signature,


Scenario 3 :
MainPage :
<apex:page controller="PageRedirectDemo">
    <apex:form>
         <apex:inputtext value="{!strReceivedText}" /> <br/>
         <apex:commandbutton action="{!redirect}" value="Redirect"/>
</apex:form>
</apex:page>

public with sharing class PageRedirectDemo
{
   public string strReceivedText{get;set;}
   public PageRedirectDemo(){
   }

   public pagereference redirect(){
      PageReference ref = new PageReference('/apex/RedirectedPage');
      ref.setRedirect(false);
      return ref;
   }

}

RedirectedPage
<apex:page controller="PageRedirectDemo">
 <apex:outputLabel>Value received from Page 1</apex:outputLabel><br/>
 <apex:outputText> {!strReceivedText } </apex:outputText> <br/>
</apex:page>

Output :


*IMP : Observe the URL in each scenario :)

Happy Redirecting ;)


Make custom button calling web-service static method working in Lightning

Hi Folks,

Recently we switched our classic Salesforce edition into Lightning edition.

The custom button calling visual-force page worked fine in lightning but the custom button executing Javascript or calling the Webservice method are not even displayed on the page layout as it's a known thing in Lightning.

We have a custom button calling Webservice method and we have two options to make it working in lightning.
1. Create a lighting component and call it using quick action. (For this we need to enable custom domain)

2.We can call a visual-force page and execute our method using the action attribute.
   (No need to enable custom domain)

Let us see how point 2 will actually work :

Suppose we have following code in the custom button
--------------------------------------------------------------------------------------------------------------------
{!REQUIRESCRIPT("/soap/ajax/29.0/connection.js")}
{!REQUIRESCRIPT("/soap/ajax/29.0/apex.js")}

sforce.apex.execute("SurveySender","sendSurvey",{OppId:"{! Opportunity.Id}"});
alert("Survey Sending Started");


Apex Class :
global class SurveySender {
    webservice static void sendSurvey(Id OppId) {
       system.debug('>>>>>>>>>Method Executed>>>>>>>>>>>'+pOppId);            
    }
}
---------------------------------------------------------------------------------------------------------------------

To work it in lightning :

1. Convert global class as below :

global class SurveySender {

   public Opportunity objOpp;

   global SurveySender(ApexPages.StandardController stdController){
        objOpp = (Opportunity)stdController.getRecord();
   }
   
    public pagereference sendEmail(){
      sendSurvey(objOpp.Id);
      return new pagereference(url.getsalesforcebaseurl().toexternalform()+'/'+objOpp.Id);
    }

   webservice static void sendSurvey(Id OppId) {
       system.debug('>>>>>>>>>Method Executed>>>>>>>>>>>'+OppId);            
    }
}


2. Create a Visualforce page with a standard controller :

<apex:page standardController="Opportunity" extensions="SurveySender"
   action="{!sendEmail}">
</apex:page>

3. Convert custom button behavior to Display in existing window without sidebar or header
    Select content source to the Visualforce page created in step 2.

4. Now the button will behave same like the webservice method.


Happy Coding !!!!


Monday, 26 December 2016

It's always shallow copy :)

Hi Awesome Folks,

All of us are aware of the clone method of the sobject class.

I got a requirement to clone the object of the class. I thought the clone will be deep copy but to my surprise its always shallow copy.

public class Demo
{
 
    List<Account> lstAcc;

    public Demo(){
        lstAcc = new List<Account>();
        lstAcc.add(new Account(Name='Ajay'));
    }
 
    public void doclone(){
 
      system.debug('>>>>>>>>this'+this.lstAcc[0]);
   
      Demo objClone = this.clone();
      system.debug('>>>>>>>>clone'+objClone);
 
      objClone.lstAcc [0].Name = 'Vijay';
      system.debug('>>>>>>>>this.clone'+objClone.lstAcc[0]);
      system.debug('>>>>>>>>this'+this.lstAcc[0]);
    }
}

Output :
>>>>>>>>thisAccount:{Name=Ajay}

>>>>>>>>cloneDemo:[lstAcc=(Account:{Name=Ajay})]

>>>>>>>>this.cloneAccount:{Name=Vijay}

>>>>>>>>thisAccount:{Name=Vijay}


From output you can see change in the clone object modifying the main object also.

Keep Coding !!!!

Tuesday, 11 October 2016

Building Dynamic Triggers and Fieldset !!

Hi Folks,

Isn't it awesome if you are able to create trigger and fieldset dynamically :)

1) Create Trigger Dynamically :
map<string,string> mapinfo= new map<string,string>();
mapinfo.put('Name','AccountTrigger');
mapinfo.put('TableEnumOrId','Account');
mapinfo.put('Body','trigger AccountTrigger on Account(after insert){}');
String serialized = JSON.serialize(mapinfo);
         
Httprequest req = new HttpRequest();
req.setEndpoint('https://ajaytrailhead-dev-ed.my.salesforce.com/services/data/v27.0/sobjects/ApexTrigger'); // Enter the org.
req.setMethod('POST');
req.setHeader('Content-Type','application/json');
req.setHeader('Authorization','Bearer '+UserInfo.getSessionID());
req.setBody(serialized);

Http httpReq = new Http();
HttpResponse res = httpReq.send(req);
System.debug(res.getBody());

2) Create FieldSet Dynamically :

To make it possible you need to add the following class to your org.

https://github.com/financialforcedev/apex-mdapi/blob/master/apex-mdapi/src/classes/MetadataService.cls

Use below code to create fieldset dynamically :

public with sharing class DynamicFieldSetCreator
{
public static MetadataService.MetadataPort createService()
{
 MetadataService.MetadataPort service = new MetadataService.MetadataPort();
 service.SessionHeader = new MetadataService.SessionHeader_element();
 service.SessionHeader.sessionId = UserInfo.getSessionId();
 return service;
}
   
public static void createFieldSet()
{
        MetadataService.MetadataPort service = createService();

MetadataService.FieldSet fieldSet = new MetadataService.FieldSet();
        fieldSet.fullName = 'Account.MyFieldSet'; // You can use custom object also.                                                                                                             //Mycustomobject__c.MyFieldSet
        fieldSet.label = 'My FieldSet';
        fieldSet.description = 'Demo fieldset';

        MetadataService.FieldSetItem myAvailableField = new MetadataService.FieldSetItem();
        myAvailableField.field = 'Name'; // Add standard/custom fields to be included in fieldset
        myAvailableField.isFieldManaged = true;
        myAvailableField.isRequired = true;

        fieldSet.availableFields = new List<MetadataService.FieldSetItem>();
        fieldSet.availableFields.add(myAvailableField);

        List<MetadataService.SaveResult> results =
            service.createMetadata(new MetadataService.Metadata[] { fieldSet });
        handleSaveResults(results[0]);
}

public static void handleSaveResults(MetadataService.SaveResult saveResult)
    {
        if(saveResult==null || saveResult.success)
            return;

        // Handle Errors
        if(saveResult.errors!=null)
        {
            List<String> Erros = new List<String>();
            Erros.add(
                (saveResult.errors.size()==1 ? 'Error ' : 'Errors ') +
                    'occured processing component ' + saveResult.fullName + '.');
            for(MetadataService.Error error : saveResult.errors)
                Erros.add(
                    error.message + ' (' + error.statusCode + ').' +
                    ( error.fields!=null && error.fields.size()>0 ?
                        ' Fields ' + String.join(error.fields, ',') + '.' : '' ) );
            if(Erros.size()>0)
            {
                system.debug('>>>>>>>>>>>>>Here');
               
             }
        }
        if(!saveResult.success)
        {
            system.debug('>>>>>>>>>>>>>HereAlso');
        }
    }
}

Keep Coding !!!!


Tuesday, 9 August 2016

Stuck with Salesforce Limited Feed Tracking.....Here you go with UNLIMITED Feed Tracking.......

Hi Awesome Salesforce Developers,

Recently I got a requirement where a client wants feed tracking for every change that Users are doing.Salesforce Limits Feed Tracking to 20 fields per object.
I have used FieldSet and After Update trigger on object (for which we want to do feed tracking) to overcome the 20 field limit.

What is feed tracking ? 
The below salesforce documentation link will explain in detail : 
https://help.salesforce.com/apex/HTViewHelpDoc?id=collab_feed_tracking_overview.htm&language=en

Example : Account Feed tracking 

IMP : Enable Feed Tracking by : 
setup -> Chatter -> FeedTracking -> Select Account -> Click on Enable Feed Tracking

Step 1) Create field set on Account called AccountChatter. Add the fields you want to track in feed tracking.

Step 2) Create the following after update trigger on Account : 

trigger AccountChatter on Account (after update) 
{
 List<Schema.FieldSetMember> lstTrackedFields = SObjectType.Account.FieldSets.AccountChatter.getFields();

 if (lstTrackedFields.isEmpty()) return; 
    
 List<FeedItem> lstFieldChanges = new List<FeedItem>();
    
 if(!trigger.isUpdate) return;
    
for (Account objNewAccount : trigger.new) 
{

 final Account oldAccount = trigger.oldmap.get(objNewAccount.Id);
    // Iterate over all fields in Fieldset 
 for (Schema.FieldSetMember objField : lstTrackedFields) 
 {
String fieldName  = objField.getFieldPath();
String fieldLabel = objField.getLabel();

if (objNewAccount.get(fieldName) == oldAccount.get(fieldName))
continue;

String oldValue = String.valueOf(oldAccount.get(fieldName));
String newValue = String.valueOf(objNewAccount.get(fieldName));

if (oldValue != null && oldValue.length()>255) 
oldValue = oldValue.substring(0,255);

if (newValue != null && newValue.length()>255) 
newValue = newValue.substring(0,255); 

FeedItem post = new FeedItem();
post.ParentId = objNewAccount.Id; // RecordId
post.Body = UserInfo.getName()+' changed '+fieldLabel+' from '+oldValue +' to '+newValue ;

lstFieldChanges.add(post);
  }
}

if (!lstFieldChanges.isEmpty()) insert lstFieldChanges;

}

Output : 
Add fields in FieldSet :


Create Record in Account with Name : Ajay test chatter 

Now update the record with Name : Ajay test verified


The above solution implemented by taking idea from below post :
(To overcome the limit of History Tracking)
http://salesforce.stackexchange.com/questions/39956/what-is-the-best-workaround-for-the-20-field-history-tracking-cap

Happy Coding !!!

Cheers !!


Tuesday, 26 July 2016

Integrating Significant Ecommerce and Helpful Platforms with Salesforce

Hi Awesome Salesforce Developers,

Recently I did custom integrations with shopify,bill.com,LiveChat,Helpscout so sharing with you authentication request/response formats.

Integration with Shopify.com 
(Using private app in Shopify)
Shopify is a complete e-commerce solution that allows you to set up an online store to sell your goods. It lets you organize your products, customize your storefront, accept credit card payments, track and respond to orders — all with a few clicks of the mouse.

Firstly you need to create private app in Shopify.com which will generate the API key , Password,Shared secret

You need to use those keys for authentication purpose and while sending REST requests from salesforce : 

Shopify API Documentation : https://docs.shopify.com/api

Example : Create customer in Shopify.com from salesforce 
API : https://help.shopify.com/api/reference/customer#create

POST Request from salesforce  :

JSONGenerator gen = JSON.createGenerator(true);
gen.writeStartObject();
 gen.writeFieldName('customer');
 gen.writeStartObject();
   gen.writeStringField('email', Contact.Email);        
   gen.writeStringField('first_name', Contact.FirstName);
   gen.writeStringField('last_name', Contact.LastName);             
 gen.writeEndObject();
gen.writeEndObject();

string strRequest = gen.getAsString();

Http objHttp = new Http();

HttpRequest request = new HttpRequest(); 
request.setMethod('POST'); 
Blob headerValue = Blob.valueOf('your apikey: your password');
String authorizationHeader = 'Basic ' + EncodingUtil.base64Encode(headerValue);
request.setHeader('Authorization', authorizationHeader);
request.setHeader('Content-Type', 'application/json');
request.setBody(strRequest);
request.setEndpoint('https://apikey:password@nameofyourshop.myshopify.com/admin/customers.json'); 

HttpResponse res = objHttp.send(request);  

Map<String, Object> mapResponse =                                                                                   (Map<String,Object>)JSON.deserializeUntyped(res.getBody());

Map<String, Object> mapCustomerData =
                       (Map<String, Object>)mapResponse.get('customer');

if(mapCustomerData .containskey('id'))
system.debug('>>>Shopify='+string.valueof(mapCustomerData.get('id'));)


Integration with Bill.com
Bill.com is a US-based cash flow management software system, provided as a software as a service that integrates with accounting and banking systems. It is intended to serve as a command and control dashboard for cash flow, by businesses, accounting firms and banks.

Documentation : http://developer.bill.com/api-documentation/api/bill

Every API request needs a valid session id, which is obtained by issuing a Login request. Login API takes in an organization id, developer (or application) key, and user credentials (or Token), and returns a valid session id, as well as an end-point URL, which should be used for any subsequent API requests. This session id will remain valid for up to 35 minutes without activity. If the session becomes inactive, you will have to issue a new Login request and obtain a new session ID. You can explicitly end the session by issuing a Logout request.

You need Bill.com -> username,password,OrganizationId,Devkey which can obtain from bill.com account / support.

Login Request :
String strLoginRequest = 'userName='+'Bill_com_Username'+'&password='+'Bill_com_Password'
                   +'&orgId='+'Bill_com_OrgId'+'&devKey='+'Bill_com_Devkey'+';

HttpRequest objHttpReq = new HttpRequest();
objHttpReq.setHeader('Content-Type','application/x-www-form-urlencoded');
objHttpReq.setEndpoint('EndPOINTURL'+'/Login.json');
objHttpReq.setMethod('POST');
objHttpReq.setbody(strLoginRequest);

Http http = new Http();
HTTPResponse objHttpResp = http.send(objHttpReq);     

if (objHttpResp.getStatusCode()==200)
{
  Map<String,object> mapLoginResp = (Map<String,object>)JSON.deserializeUntyped(objHttpResp.getBody());
   
 if(mapLoginResp.containsKey('response_status') &&   Integer.valueOf(mapLoginResp.get('response_status'))==0)
 {
  if (mapLoginResp.containsKey('response_data') && 
                    mapLoginResp.get('response_data') instanceof map<string,object>)
   {   
   Map<String,Object> mapLoginRespData =  (Map<String,Object>)mapLoginResp.get('response_data');
   
   if(mapLoginRespData.containskey('apiEndPoint') )
   { 
    system.debug('>apiEndPoint='+string.valueof(mapLoginRespData.get('apiEndPoint')));
     system.debug('>sessionId='+string.valueof(mapLoginRespData.get('sessionId')));
     system.debug('>orgId='+string.valueof(mapLoginRespData.get('orgId')));
     system.debug('>usersId='+string.valueof(mapLoginRespData.get('usersId')));
   }
   }  
 }
}


The session Id,API end point to need to use for making next requests:

For example :Create Bill request : 

HttpRequest objHttpReq = new HttpRequest();
objHttpReq.setEndpoint('ENDPOINTURL');
objHttpReq.setMethod('POST');
objHttpReq.setbody('devKey='+'DEVKEY'+'&sessionId='+'SESSION ID RECEIVED from LOGIN'+'&orgId='+'Bill_com_OrgId'+'&data='+'RequestBODY');
objHttpReq.setHeader('Content-Type','application/x-www-form-urlencoded');       
Http http = new Http();
HTTPResponse objHttpResp = http.send(objHttpReq); 


Integration with LiveChat :
LiveChat is an online customer service software with live support, help desk software and web analytics capabilities. It was first launched in 2002 and since then it is developed and offered in SaaS (software as a service) business model by LiveChat Software.

Documentation : https://developers.livechatinc.com/rest-api/

Request to get all chats :
Livechat give the response in pages so intially we need to make request with page=1 and get a total number of pages. Do the requests till you reach the last page.

    integer intPageCountFromBatch = 1;

    Http objHttp = new Http();
    HttpRequest request = new HttpRequest(); 
    request.setMethod('GET'); 
    Blob headerValue = Blob.valueOf('Livechatusername/email:apikey');
    String authorizationHeader = 'Basic ' +    EncodingUtil.base64Encode(headerValue);
    request.setHeader('Authorization', authorizationHeader);
    request.setHeader('Content-Type', 'application/json');
    request.setHeader('X-API-Version','2');
    request.setEndpoint('https://api.livechatinc.com/chats?page='+intPageCountFromBatch);
    request.setTimeout(120000); 
    HttpResponse res = objHttp.send(request);  

if (res.getStatus() == 'OK')
{
  Map<String, Object> mapResponse =
          (Map<String, Object>)JSON.deserializeUntyped(res.getBody());

  if (mapResponse.containsKey('pages'))
  intTotalPageCount = String.valueOf(mapResponse.get('pages')) != null ? Integer.valueOf(String.valueOf(mapResponse.get('pages'))) : 1 ;
      
List<Object> lstChatData =(List<Object>)mapResponse.get('chats');
   
}

IMP : You need to make callout till you reach the last page number.


Integration with HelpScout :
Help Scout is a simple help desk designed for small businesses. 

Documentation : http://developer.helpscout.net/help-desk-api/

integer intPageCountFromBatch = 1;

Http objHttp = new Http();
HttpRequest request = new HttpRequest(); 
request.setMethod('GET'); 
Blob headerValue = Blob.valueOf('APIKey:Password');
String authorizationHeader = 'Basic ' + EncodingUtil.base64Encode(headerValue);
request.setHeader('Authorization', authorizationHeader);
request.setHeader('Content-Type', 'application/json');
request.setEndpoint('https://api.helpscout.net/v1/mailboxes/YourMailboxId/conversations.json?page='+intPageCountFromBatch); 

HttpResponse res = objHttp.send(request);
request.setTimeout(120000); 

if (res.getStatus() == 'OK')
{
Map<String, Object> mapResponse = (Map<String, Object>)JSON.deserializeUntyped(res.getBody());

if (mapResponse.containsKey('pages'))
  intTotalPageCount = String.valueOf(mapResponse.get('pages')) != null ? Integer.valueOf(String.valueOf(mapResponse.get('pages'))) : 1 ;

 List<Object> lstChatData = (List<Object>)mapResponse.get('items');
}


IMP : You need to make callout till you reach the last page number.


For both LiveChat & HelpScount you need to implement the batch chain logic.

Feel free to contact for detailed code : ajay.ghuge09@gmail.com

Cheers,
Ajay

Tuesday, 10 May 2016

Picklist Handling in Salesforce

Hi Awesome Salesforce Developers,

I hope you have enjoyed the last three blogs.

The current blog is related with handling picklist values in salesforce.

We can use picklist in many ways on VisualForce page i.e either use the field defined as picklist data type or build your own picklist using <apex:selectlist>

For this purpose, I have created the custom fields called Product Single Select & Product with datatype as picklist and picklist (Multiselect) on Case object.

On visual force page also, I have created picklists using <apex:selectlist> with attribute multi-select.

The visualforce page will look like below :


When you select value/values from each picklist and click on show values button the output panel will display how salesforce will give values from each picklist in the apex controller.


* Please check the result of standard and custom multi-select picklist selection.
In standard multi-select picklist values are separated using (;) and in custom multi-select values are surrounded with [] & (,).

For getting values you need to split the string using (;) or (,).

Sharing below controller and visual force page of above demo :

Apex Controller :
public with sharing class CasePickDemoController
{
    public Case objCase {get;set;}
    public string strProduct {get;set;}
    public string strProducts {get;set;}
    public boolean blnshowresult{get;set;}
    
    public CasePickDemoController(ApexPages.StandardController controller) 
    {
      objCase = new Case();
      blnshowresult = false;
    }
    
    public List<SelectOption> getlstProductSingleSelect()
    {
        List<SelectOption> lstProduct = new List<SelectOption>();
        lstProduct.add(new SelectOption('--None--','--None--'));
        lstProduct.add(new SelectOption('GC1040','GC1040'));
        lstProduct.add(new SelectOption('GC3020','GC3020'));
        return lstProduct;
    } 
     
    public List<SelectOption> getlstProductMultiSelect()
    {
        List<SelectOption> lstProduct = new List<SelectOption>();
        lstProduct.add(new SelectOption('--None--','--None--'));
        lstProduct.add(new SelectOption('GC1040','GC1040'));
        lstProduct.add(new SelectOption('GC3020','GC3020'));
        return lstProduct;
    } 
     
    public void getPickListValues()
    {
      blnshowresult = true;
      system.debug('>'+objCase.Product_Single_Select__c);
      system.debug('>>>>>>>>objCase.Product__c '+objCase.Product__c);
      system.debug('>>>>>>>>strProduct '+strProduct);     
      system.debug('>>>>>>>>strProducts'+strProducts);
    }
}


VisualForce Page :
<apex:page standardController="Case"  extensions="CasePickDemoController">
<apex:form >
<apex:pageblock>
<apex:pageblocksection>
  <apex:pageBlockSectionItem >
 <apex:outputLabel value="Product Single Select Picklist"/> 
 <apex:inputfield value= "{!objCase.Product_Single_Select__c}"/>         
  </apex:pageBlockSectionItem>      
<br/>
   <apex:pageBlockSectionItem >
 <apex:outputLabel value="Product Multi Select Picklist"/>
 <apex:inputField value="{!objCase.Product__c}" />
   </apex:pageBlockSectionItem>          
<br/>
   <apex:pageBlockSectionItem >
 <apex:outputLabel value="Product Custom Single Select Picklist "/>
 <apex:selectList size="5" value="{!strProduct}" multiselect="false">
   <apex:selectOptions value="{!lstProductSingleSelect}" />
 </apex:selectList>
   </apex:pageBlockSectionItem>  
<br/>
   <apex:pageBlockSectionItem >
 <apex:outputLabel value="Product Custom Multi Select Picklist "/>
 <apex:selectList size="5" value="{!strProducts}" multiselect="true">
   <apex:selectOptions value="{!lstProductMultiSelect}" />
      </apex:selectList>
 </apex:pageBlockSectionItem>
   </apex:pageblocksection>
</apex:pageblock>
      
<apex:commandButton value="Show Values" action="{!getPickListValues}"/> <br/>

<apex:outputpanel rendered="{!blnshowresult}">
 <apex:outputLabel value="Values selected from standard pickist field (Single)"/>
 <apex:outputLabel value = "{!objCase.Product_Single_Select__c}"/>
 <br/> <br/>
 <apex:outputLabel 
      value="Values selected from standard pickist field (MultiSelect)"/>
 <apex:outputLabel value = "{!objCase.Product__c}"/> 
 <br/> <br/>
 <apex:outputLabel 
     value="Values selected from custom pickist (Multiselect= false)"/>
 <apex:outputLabel value = "{!strProduct}"/>
  <br/> <br/>
 <apex:outputLabel 
    value="Values selected from custom pickist (Multiselect= true)"/>
 <apex:outputLabel value = "{!strProducts}"/>   
</apex:outputpanel>
</apex:form>
</apex:page>

Happy Coding !!!!