Hello Awesome Developers,
Today I am coming with the interesting blog of ADMIN+DEVELOPMENT thing.
I hope all of you know about the document generation tool conga composer which
merge the data into templates for pixel-perfect proposals, quotes and more in Word,
PowerPoint, Excel, HTML emails & PDF's.
How conga composer work?
1) Configure template, email template, conga query etc with conga field format
2) Create custom button to launch the conga app along with required parameters
like templateId etc
You can visit https://support.getconga.com for more details on this.
Our Scenario :
We have following custom object structure :
Class__c Participants__c
Name Contact - (Lookup to contact)
Class - (Lookup to Class__c)
So 1 class can have many participants.
Before the class begins the user needs to send the announcement email to participants.
For example, Salesforce Training is the class with 10 enrollments.Before class begins
user suppose to send announcement email to all of the participant's using configured
conga email template.
General Conga Configuration :
1. Configure conga email templates with conga fields.(Field coming from Class object (Merge Field))
2. Create a custom detail page button on Class__c object with content source as URL
and enter the URL (This you will find in conga documentation)
For conga 8 it is :
/apex/APXTConga4__Conga_Composer?serverUrl={!API.Partner_Server_URL_290}&id={!Class__c.Id}
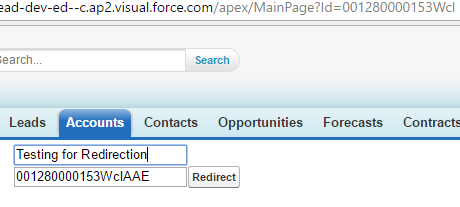
3. This will result as follows :

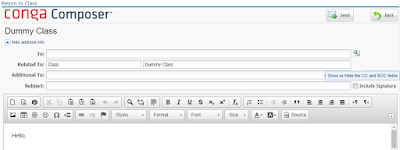
4. On-click of this button the conga composer window will launch and you will need
to select the template and click "Merge and Email" producing the following result
Our Challenge :
Auto-populate the "to" or "AdditionalTo" or "BCC"
with Emails of Enrollments.
As per conga documentation, you can add following parameters in the custom button URL
1) EmailToId : Contact Or LeadId
2) EmailAdditionalTo : Email Address
Since the number of enrollments (with contact lookup) are not fixed so we can not use option 1.
In the option 2, we can give comma separated list of emails
(In our case List of Enrollment__r.Contact__r.Email)
Solution :
1. Create a long text field (Enrollment Emails) at a Class level which will store a comma
separated list of emails captured from the enrollments once it's inserted, updated, deleted.
2. Trigger on Enrollment to update the class with the enrollment emails.
3. Change the conga button URL to :
/apex/APXTConga4__Conga_Composer?serverUrl={!API.Partner_Server_URL_290}&id={!SFDC_Class__c.Id}&EmailAdditionalTo={!Class__c.Enrollment_Emails__c}
Above will result in the following :
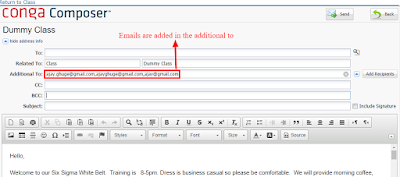
In case you want to emails in BCC then use EmailBCC parameter.
Trigger code you will find at this link :
https://docs.google.com/document/d/1W85Z_Iqdcqq9Sq9W8Bq42vBdOmCUjBar5gQE0I1D6eQ/edit?usp=sharing
The above solution will work in lighting as well :)
Happy Coding !!!!
Today I am coming with the interesting blog of ADMIN+DEVELOPMENT thing.
I hope all of you know about the document generation tool conga composer which
merge the data into templates for pixel-perfect proposals, quotes and more in Word,
PowerPoint, Excel, HTML emails & PDF's.
How conga composer work?
1) Configure template, email template, conga query etc with conga field format
2) Create custom button to launch the conga app along with required parameters
like templateId etc
You can visit https://support.getconga.com for more details on this.
Our Scenario :
We have following custom object structure :
Class__c Participants__c
Name Contact - (Lookup to contact)
Class - (Lookup to Class__c)
So 1 class can have many participants.
Before the class begins the user needs to send the announcement email to participants.
For example, Salesforce Training is the class with 10 enrollments.Before class begins
user suppose to send announcement email to all of the participant's using configured
conga email template.
General Conga Configuration :
1. Configure conga email templates with conga fields.(Field coming from Class object (Merge Field))
2. Create a custom detail page button on Class__c object with content source as URL
and enter the URL (This you will find in conga documentation)
For conga 8 it is :
/apex/APXTConga4__Conga_Composer?serverUrl={!API.Partner_Server_URL_290}&id={!Class__c.Id}
3. This will result as follows :
4. On-click of this button the conga composer window will launch and you will need
to select the template and click "Merge and Email" producing the following result

Our Challenge :
Auto-populate the "to" or "AdditionalTo" or "BCC"
with Emails of Enrollments.
As per conga documentation, you can add following parameters in the custom button URL
1) EmailToId : Contact Or LeadId
2) EmailAdditionalTo : Email Address
Since the number of enrollments (with contact lookup) are not fixed so we can not use option 1.
In the option 2, we can give comma separated list of emails
(In our case List of Enrollment__r.Contact__r.Email)
Solution :
1. Create a long text field (Enrollment Emails) at a Class level which will store a comma
separated list of emails captured from the enrollments once it's inserted, updated, deleted.
2. Trigger on Enrollment to update the class with the enrollment emails.
3. Change the conga button URL to :
/apex/APXTConga4__Conga_Composer?serverUrl={!API.Partner_Server_URL_290}&id={!SFDC_Class__c.Id}&EmailAdditionalTo={!Class__c.Enrollment_Emails__c}
Above will result in the following :

In case you want to emails in BCC then use EmailBCC parameter.
Trigger code you will find at this link :
https://docs.google.com/document/d/1W85Z_Iqdcqq9Sq9W8Bq42vBdOmCUjBar5gQE0I1D6eQ/edit?usp=sharing
The above solution will work in lighting as well :)
Happy Coding !!!!